Finished already? Perea P60 pergola awnings from Warema are quick and easy to install
Patios offer countless possibilities, whether barbecuing with the neighbours, reading in peace or practising yoga as the sun goes down. To make the most of this space and ensure it can be used throughout the year, developers invest in high-quality sun shading and weather protection – a great opportunity for specialised retailers. Warema’s attractive Perea pergola awnings make patios comfortable, versatile and usable all year round. Read on to find out how easy they are to install.
Perea pergola awning poles make them particularly stable and perfect for shading larger areas of up to 30 square metres. Their timeless, modern and elegant design fits in with many architectural styles and gives patios a unique look. In addition, a wide variety of hues, designs and frame colours allow awnings to be tailored to users’ personal tastes. And the options continue beyond the awning design, with a range of accessories to complete the outdoor living experience. Valance roller blinds and front-mounted awnings with easyZIP guidance ensure complete privacy and protect against low sun and wind. Radiant heaters provide comforting warmth and lighting from LED strips creates a pleasant atmosphere. All elements can be easily controlled via Warema Mobile System (WMS) radio remote control.
The P60 Perea pergola awning easily withstands even strong wind and rain. Its rainproof fabric features a PVC grid that drains the water into the integrated drainage gutter, controlling water flow. Warema’s patented secudrive® system provides optimal fabric tension throughout. When retracted, the fabric completely disappears into the compact cover panel to protect it from soiling.
Correct installation is just as important as product quality in ensuring that customers can enjoy their pergola awnings for years to come. Below we explain the installation process.
Note on image usage:
The use of the unchanged images is only permitted in the context of the respective press release and exclusively for editorial reporting on WAREMA products, not for advertising purposes. Please use "Copyright WAREMA" as the correct acknowledgment of the source. Please send a digital specimen copy.
Downloads
Step 1: Check delivery against the delivery note and order details to ensure products are complete and in perfect condition
Step 2: Set up construction site (at least 2 installers required)
Step 3: Measure installation height and width
Step 4: Unpack parts carefully
Step 5: Screw on console counterpieces
Step 6: Mark console installation height (lower edge of console)
Step 7: Drill holes
Step 8: Clean out drilled holes, then insert threaded rod and fix in place with appropriate material
Step 9: Level console after checking that the mounting substructure is flat.
Take into account the setting time, which depends on the temperature. Seal drilled holes with appropriate sealant to prevent moisture from getting into the building
Step 10: Mark location of rain hood
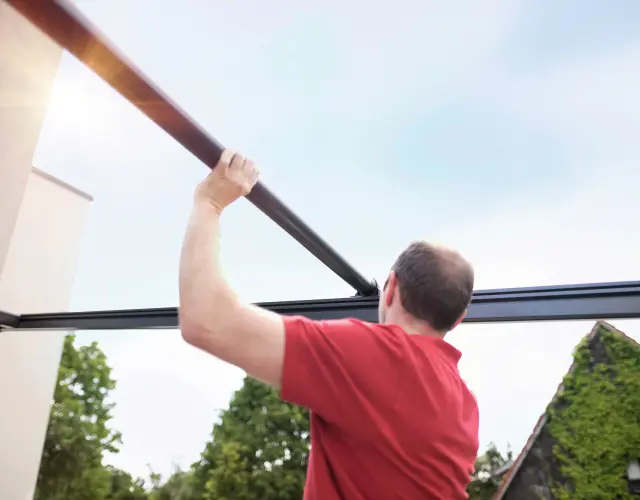
Step 11: Raise awning with lifter (awning weight 80 kg. Please note: awning is not secured and may fall)
Step 12: Attach awning to rear hook on console
Step 13: Awning is now attached to the building
Step 14: Prepare poles for installation by screwing on base plates (all technology is integrated into cassette – increases functional reliability, saves time and makes installation easier)
Step 15: Screw rain gutter and poles together
Step 16: Prepare guide rails for installation
Step 17: LED cables are pre-fitted in the factory, guide rails contain no technology, push holders into rails to connect the guide rails to the front of the portal
Step 18: Front portal is ready-screwed and must be propped up to be screwed to the guide rails
Step 19: Screw guide rails and cassette together and pull out LED strip so that it can be installed in the cassette later (SecuDrive technology à pull out plastic inlay, insert SecuDrive steel strip with fabric and screw guide rails and cassette together)
Step 20a: Screw guide rails to portal
Step 20b: Screw guide rails to portal
Step 21: Perea frame is now standing
Step 22: Slide in reinforcement profile to attach
Step 23a: Install reinforcement profile and align the system
Step 23b: Install reinforcement profile and align the system
Step 24a: Before attaching the poles to the base, check the width and angularity against the measurements to ensure that the rain gutter is straight (poles are cut with millimetre precision in accordance with the measurements)
Step 24b: Before attaching the poles to the base, check the width and angularity against the measurements to ensure that the rain gutter is straight (poles are cut with millimetre precision in accordance with the measurements)
Step 25: Attach side pieces for rain hood
Step 26: Rain hood is installed completely
Step 27: Run motor to limit position and program into system, then perform several test runs (with smart test cable)
Step 28: Stow integrated control inside cassette , WMS radio remote control already programmed in the factory (incl. light), EWFS Plug receiver for external venetian blinds etc., radio operation sufficient
Step 29: Installation is complete
Share this page:
Your direct contact to us